ZEuS Stud Prüf Abmeldung/Studentische: Difference between revisions
From ZEuS-Wiki english
m Text replacement - "=====Information and editing options=====" to "" |
m Text replacement - "[[Kategorie:" to "[[Category:" |
||
| Line 270: | Line 270: | ||
</ul>}} | </ul>}} | ||
[[ | [[Category:ZEuS for students]] | ||
[[ | [[Category:Examinations]] | ||
[[ | [[Category:Withdraw]] | ||
[[ | [[Category:Change selection]] | ||
[[ | [[Category:Periods]] | ||
[[ | [[Category:Examination format]] | ||
[[de:ZEuS_Stud_Prüf_Abmeldung/Studentische]] | [[de:ZEuS_Stud_Prüf_Abmeldung/Studentische]] | ||
Revision as of 08:02, 9 October 2019
Overview
During the registration or cancellation periods, you can use ZEuS to withdraw from exams that you have registered for. Sometimes, you can choose between various exam periods or formats. If this is the case, you can also make changes to your registration. Irrespective of the number of available exams, the registration process is similar to the process for course registration with single registration.
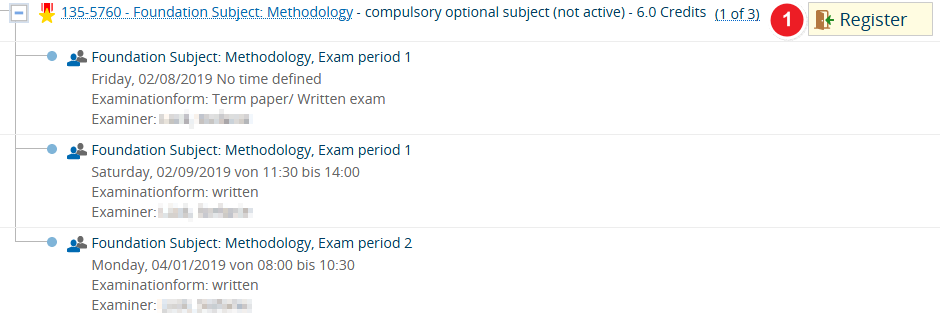
Continue reading this article to learn more about the individual steps you need to take to cancel or change your exam registration. The following instructions are for a registration started from the Planner Of Studies with module plan - examination regulations view. However, once you click on the Withdraw button ![]() , the process is identical to all other registration processes available in ZEuS.
, the process is identical to all other registration processes available in ZEuS.
How to
Cancel a registration for exams with one option (exam period/examination format)
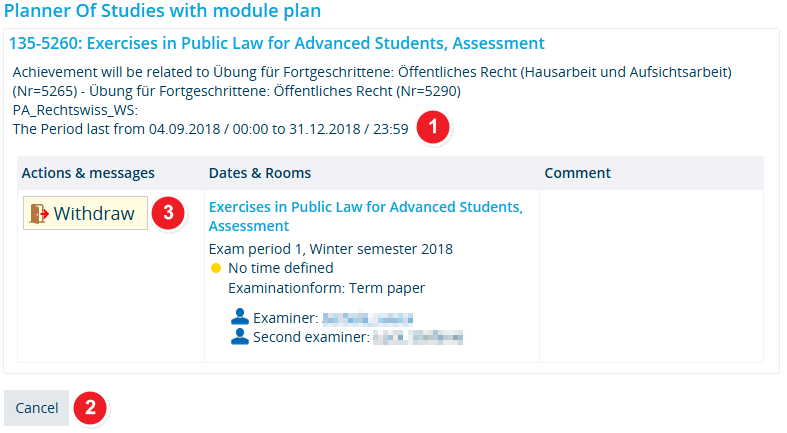
Step 1: Start by clicking “Withdraw”
Exams you have registered for will show a cancellation option in your Planner Of Studies with module plan - examination regulations view.
| Start the cancellation process by clicking Withdraw |
Step 2: Binding cancellation
The following step will result in your cancellation becoming binding. At this point, you can still stop this process.
Step 3: Confirmation of your cancellation
If your cancellation was successful, you will receive confirmation in the next step. The following notification will pop-up.
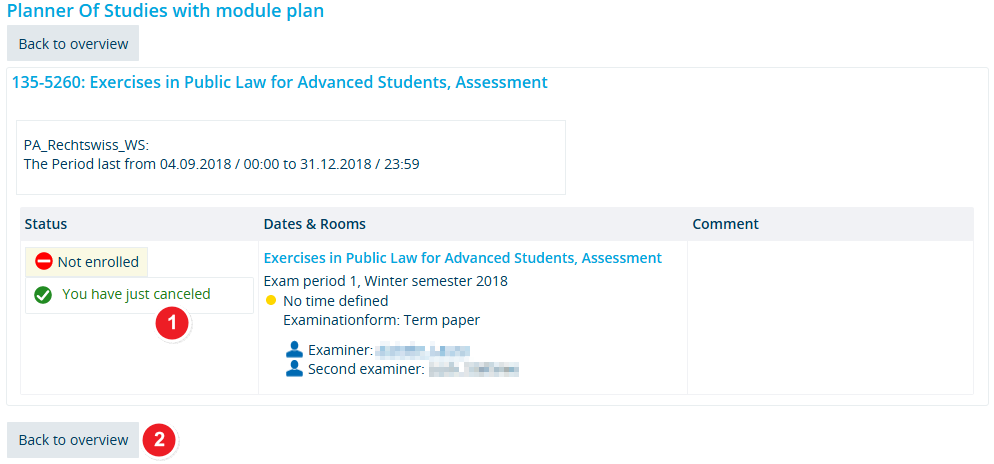
Step 4: View after cancellation
After returning to the application you started the cancellation process from, you will be shown the updated status (i.e. not registered).
| If you change your mind, you may use the Register To find out how to re-register for an exam, please read the article Registering for exams as a student. The process is identical to registering for an exam for the first time. |
Cancel a registration for an exam with a combination of different exam periods and formats
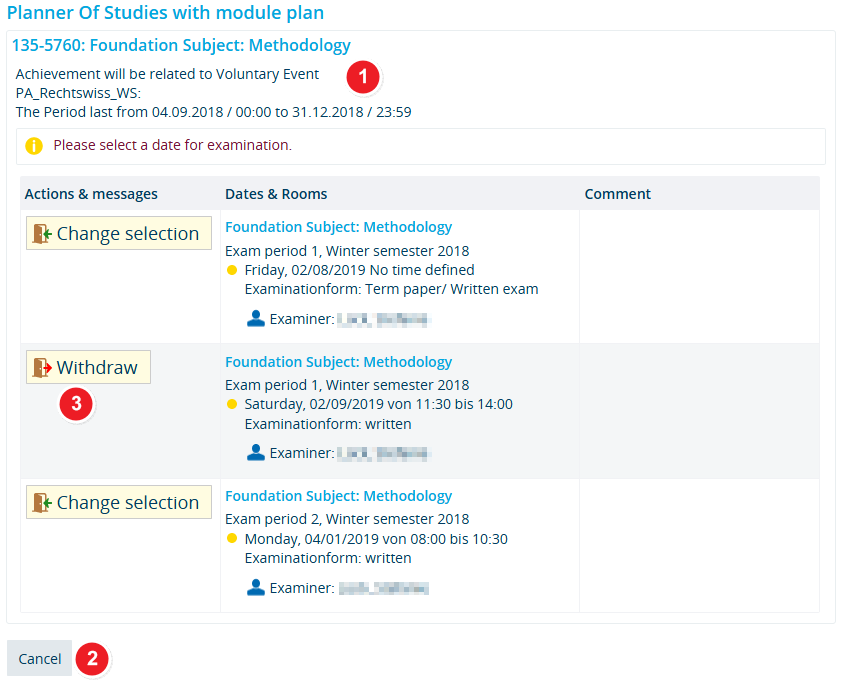
Step 1: Start by clicking “Cancel registration”
If you have registered for an exam with various options you will be shown a cancellation option in your Planner Of Studies with module plan - examination regulations view.
| Start the cancellation process by clicking Withdraw |
Step 2: Binding cancellation
The following step will result in your cancellation becoming binding. At this point, you can still stop this process.
Step 3: Confirmation of your cancellation
If your cancellation was successful, you will receive confirmation in the next step. The following notification will pop-up.
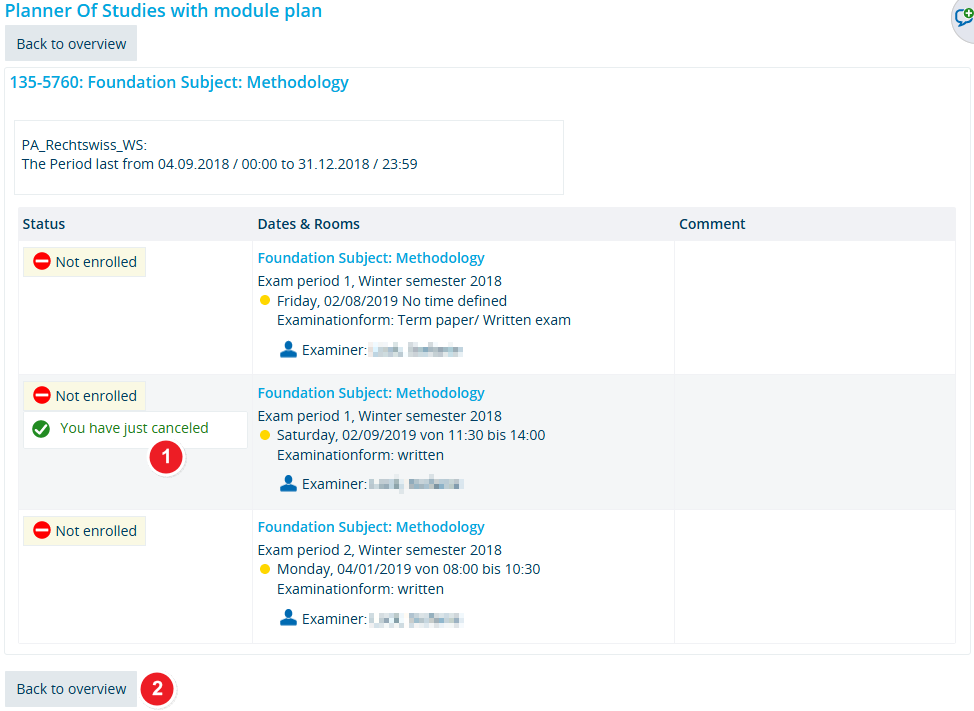
Step 4: View after cancellation
After returning to the application you started the cancellation process from, you will be shown the updated status (i.e. not registered).
| If you change your mind, you may use the Register |
Change your registration for an exam with a combination of various exam periods and formats
If there are various formats or periods for the exam in question, you can switch to another exam option during the registration period.
Step 1: Start by clicking the “Cancel registration” button
Exams with various options you have registered for will show a cancellation option in your Planner Of Studies with module plan - examination regulations view.
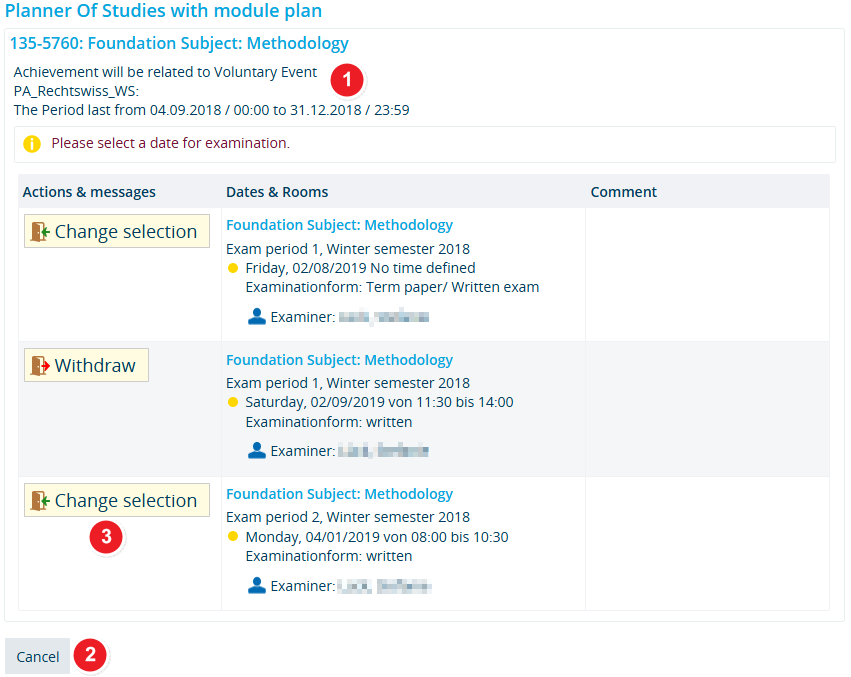
| Change your registration: click on Withdraw |
Step 2: Make binding changes to your registration
The following step will make your changes become binding. At this point, you can still stop this process.
Step 3: Confirmation of changed registration
If your cancellation was successful, you will receive confirmation in the next step. The following notification will pop-up.
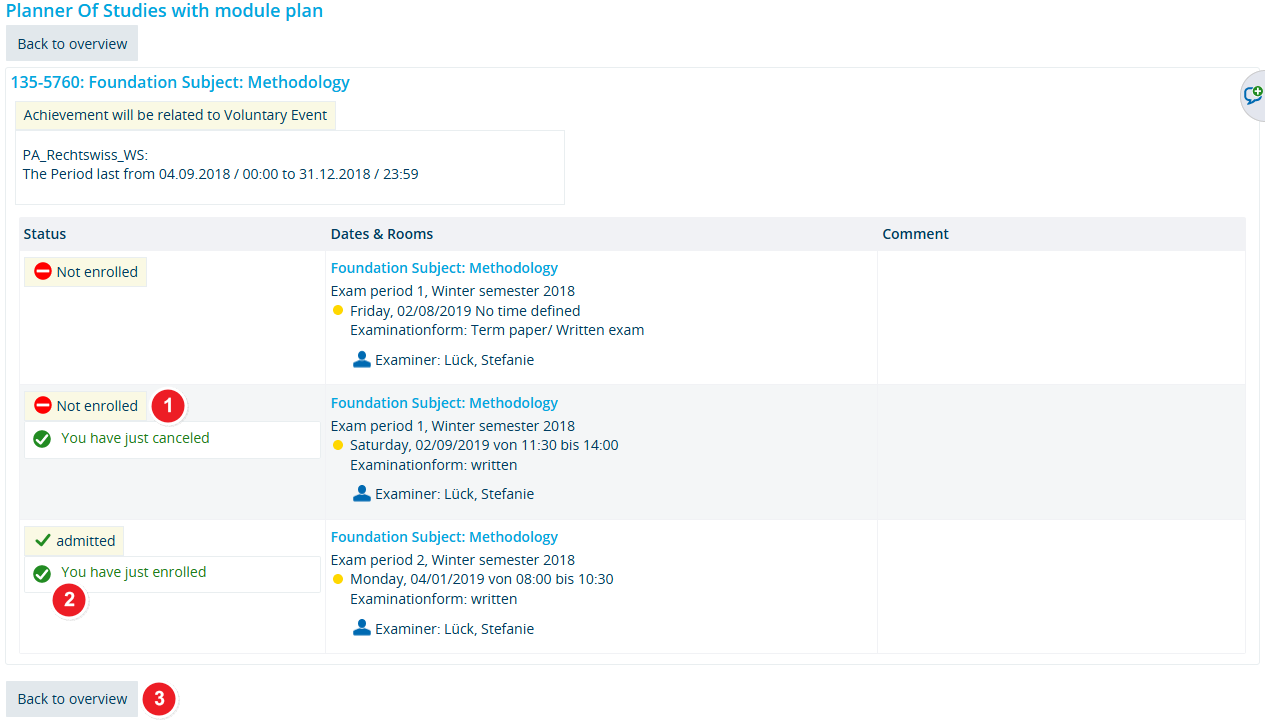
Step 4: View after changing your registration
| Click on Withdraw | |
| You will be shown your current registration status, exam option and information about the semester the registration is for - in this case admitted written für das ws 2018. |


