Registering for exams as a student
From ZEuS-Wiki english
Introduction
Provided that there is not established an implicit or a mandatory examination registration procedure, you can register or withdraw from exams during the registration or cancellation period. Sometimes, you can choose between various exam periods or formats. If this is the case, you can also make changes to your registration. Irrespective of the number of available exams, the registration process is similar to the process for course registration with single registration.
Continue reading this article to learn more about the individual steps you need to take to register for exams. If you wish to cancel or change your registration, read the Cancel or change your exam registration - overview to learn more about this. The following instructions are for a registration started from the Planner Of Studies with module plan - examination regulations view. However, once you click on the Register button ![]() , the process is identical to all other withdraw processes available in ZEuS.
, the process is identical to all other withdraw processes available in ZEuS.
How to
Register for exams with one option (exam period/examination format)
Step 1: Start by clicking “Register”
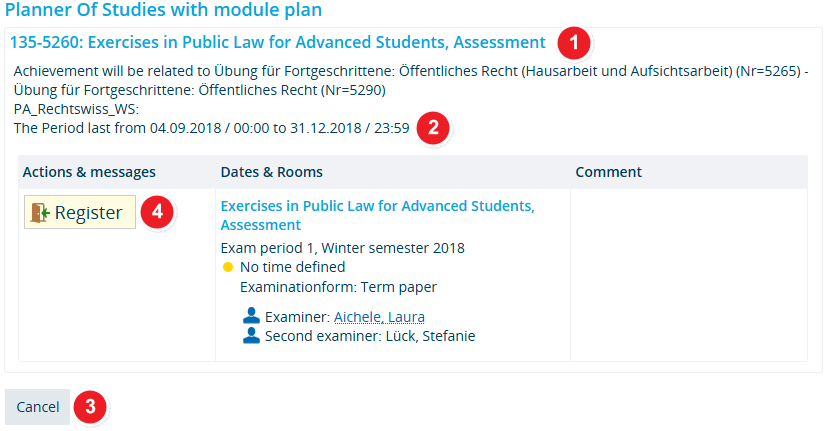
In your Planner Of Studies with module plan - examination regulations view, you will be shown an exam that you can register for.
| Start the registration process for the desired exam by clicking on Register |
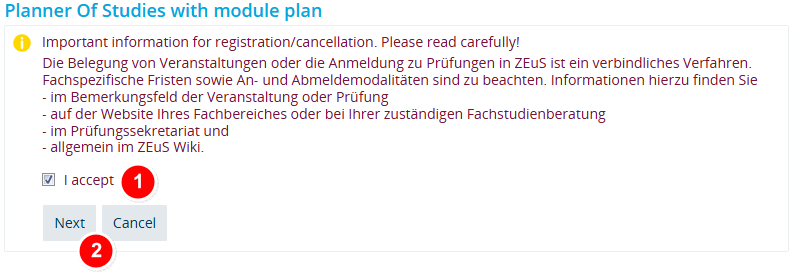
Step 2: Confirmation of legal notices
Step 3: Binding registration
Step 3: Confirmation of your registration
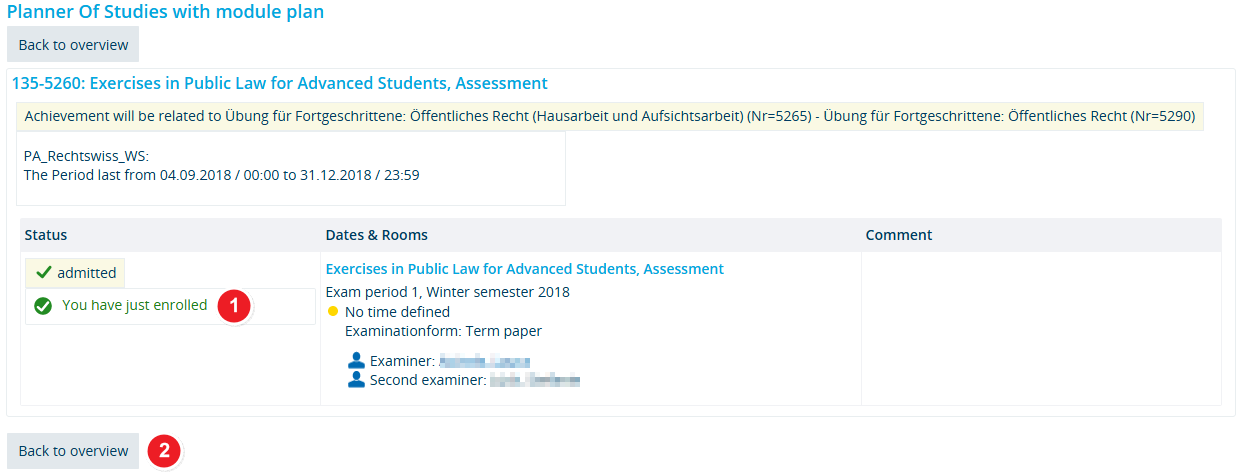
If your registration was successful, you will receive confirmation in the next step. The following notification will pop-up.
| Your registration status is now registered. | |
| Click on Back to overview to return to the application you started the registration process from - in this case Planner Of Studies with module plan. |
Step 4: View after registration
After returning to the application you started the registration process from, you will be shown the relevant examination as well as its new status and options.
| You may use the Withdraw field | |
| Your current registration status including the corresponding semester will be displayed - in this case admitted Term paper in ws 2018. |
Registration for an exam with a combination of different exam periods and formats
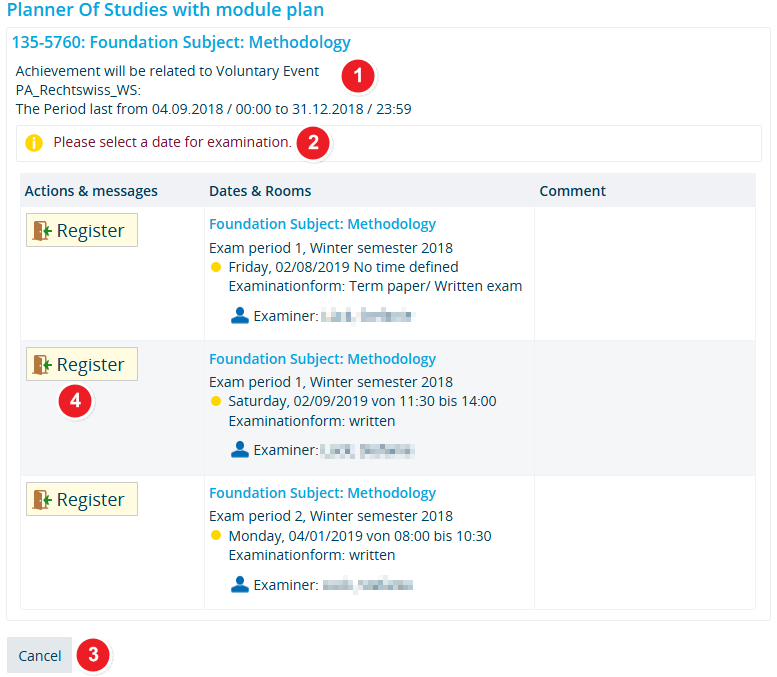
Step 1: Start by clicking on "Register"
Your Planner Of Studies with module plan - examination regulations view will show you an exam with several - in this case three - options that you have already registered an that you can now withdraw from: written exams and a term paper in two different examination periods.
| Start the registration process by clicking on Register |
Step 2: Binding registration
Step 3: Confirmation of your registration
If your registration was successful, you will receive confirmation in the next step. The following notification will pop up.
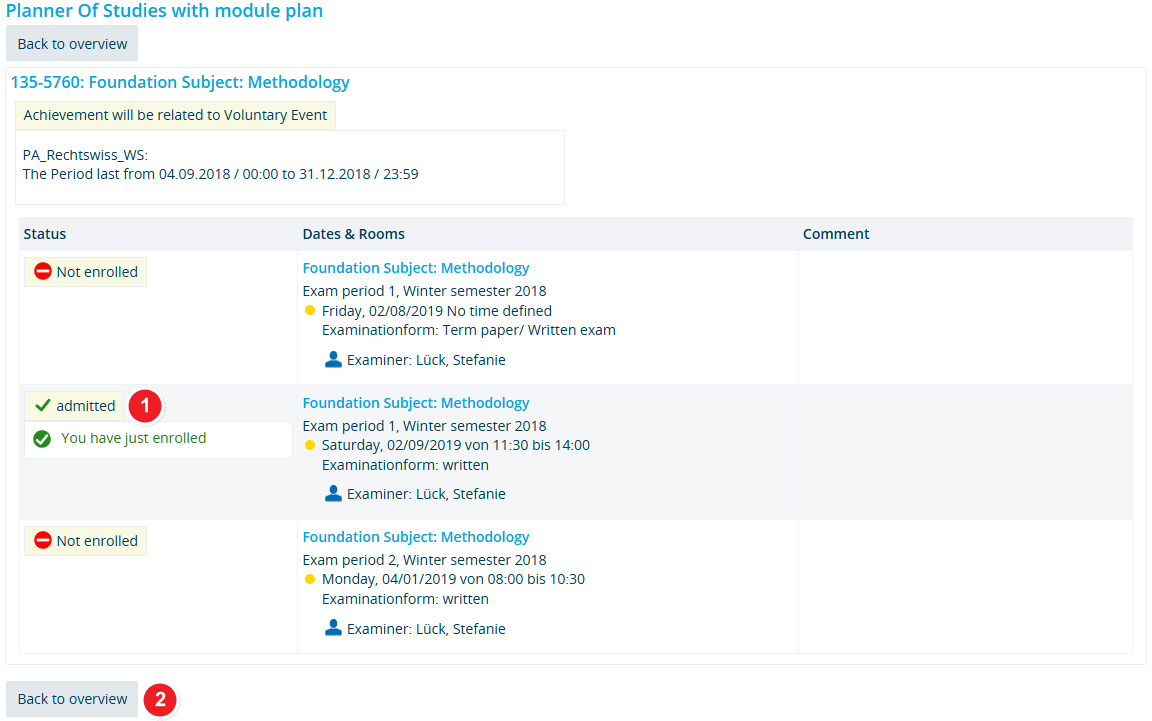
Step 4: View after registration
After returning to the application you started the registration process from, you will be shown the relevant exam as well as its new status and options.
| You may withdraw from this exam or select another exam option by clicking on the Withdraw | |
| Your current registration status including the corresponding semester and the examination form will be displayed - in this case admitted written in ws 2018. |
Why can't I see the registration button?
 |
You can only see a registration button during the official registration period for your role in ZEuS. |
So, if you can't see a registration button at an exam, have a look at the detailed view and check if there's noted a valid registration period and when it lasts.
If there is no information available on the exam detail view concerning a registration period, registration for this exam is not possible for students in ZEuS.
 |
Possibly, examination registration will take place in another way. Please contact the examination office of your department if you can't find any information for this in the description of the corresponding course. |
