ZEuS Stud SService Bilder: Difference between revisions
From ZEuS-Wiki english
Übersetzung fertig |
→View without photo: Bestehende Übersetzungen eingepflegt |
||
| Line 24: | Line 24: | ||
==Photo upload steps== | ==Photo upload steps== | ||
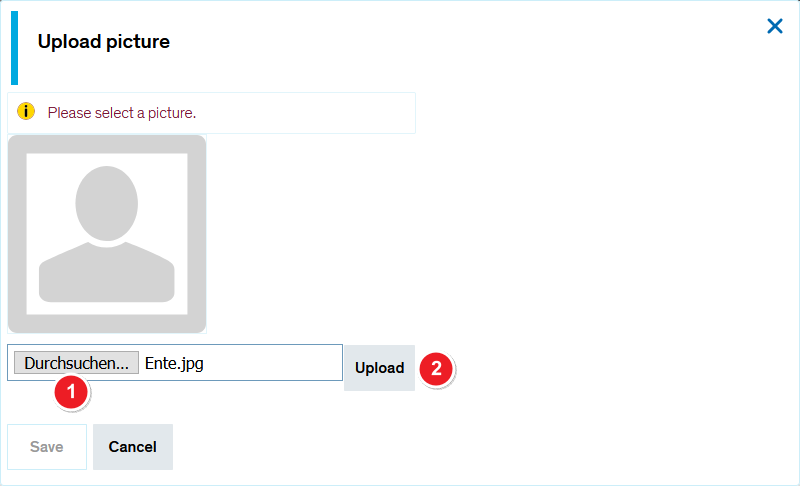
===Step 1: | ===Step 1: Select your picture=== | ||
{| style="border: 2px; border-style: solid; border-color: #00a9e0; width: 100%;" cellspacing="5" | {| style="border: 2px; border-style: solid; border-color: #00a9e0; width: 100%;" cellspacing="5" | ||
|- | |- | ||
| style="width: 33%;" | | | style="width: 33%;" | | ||
{{Klappbox-bluespice|[[File:ZEuS_icon_Screenshot.png|ZEuS_icon_Screenshot.png]] | {{Klappbox-bluespice|[[File:ZEuS_icon_Screenshot.png|ZEuS_icon_Screenshot.png]] Select your picture|2= [[File:ZEuS Stud SService Daten Foto 1 en.png|none]]}} | ||
|} | |} | ||
| Line 35: | Line 35: | ||
|- | |- | ||
| style="text-align: left; vertical-align: top; width: 50px;" |[[File:ZEuS_Stempel1.png|none|24x24px]] | | style="text-align: left; vertical-align: top; width: 50px;" |[[File:ZEuS_Stempel1.png|none|24x24px]] | ||
| style="text-align: left; vertical-align: top;" | | | style="text-align: left; vertical-align: top;" |To upload your picture, you must first select the appropriate file on your computer by clicking on <span style="color: #008000;">'''Browse...'''</span> or <span style="color: #008000;">'''Durchsuchen...'''</span>. | ||
|- | |- | ||
| style="text-align: left; vertical-align: top;" |[[File:ZEuS_Stempel2.png|none|24x24px]] | | style="text-align: left; vertical-align: top;" |[[File:ZEuS_Stempel2.png|none|24x24px]] | ||
| style="text-align: left; vertical-align: top;" | | | style="text-align: left; vertical-align: top;" |After selecting the picture you want to upload hit the <span style="color: #008000;">'''Upload'''</span> button next. | ||
|} | |} | ||
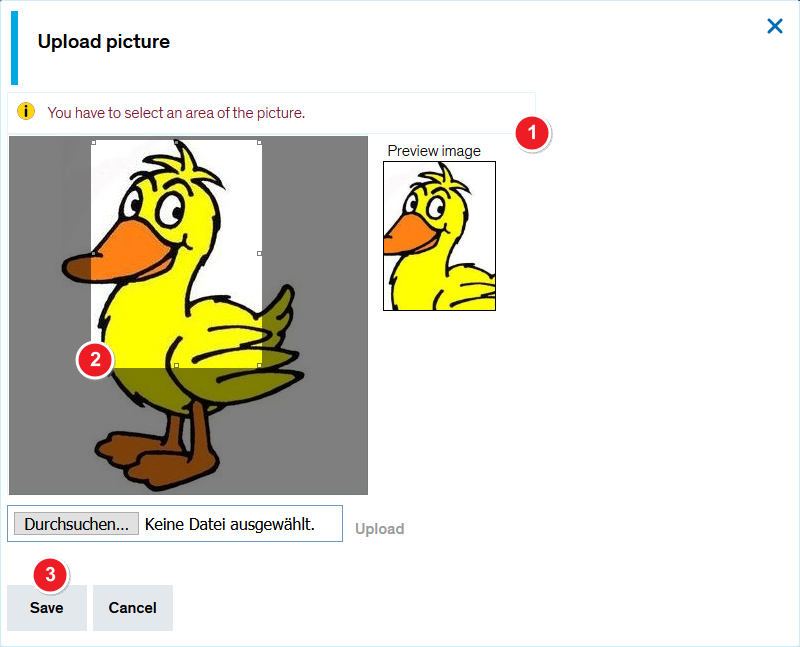
===Step 2: Select picture | ===Step 2: Select picture detail=== | ||
{| style="border: 2px; border-style: solid; border-color: #00a9e0; width: 100%;" cellspacing="5" | {| style="border: 2px; border-style: solid; border-color: #00a9e0; width: 100%;" cellspacing="5" | ||
|- | |- | ||
| style="width: 33%;" | | | style="width: 33%;" | | ||
{{Klappbox-bluespice|[[File:ZEuS_icon_Screenshot.png|ZEuS_icon_Screenshot.png]] Select picture | {{Klappbox-bluespice|[[File:ZEuS_icon_Screenshot.png|ZEuS_icon_Screenshot.png]] Select picture detail|2= [[File:ZEuS Stud SService Daten Foto 2 en.png|none]]}} | ||
|} | |} | ||
| Line 52: | Line 52: | ||
|- | |- | ||
| style="text-align: left; vertical-align: top; width: 50px;" |[[File:ZEuS_Stempel1.png|none|24x24px]] | | style="text-align: left; vertical-align: top; width: 50px;" |[[File:ZEuS_Stempel1.png|none|24x24px]] | ||
| style="text-align: left; vertical-align: top;" |If your picture doesn't | | style="text-align: left; vertical-align: top;" |If your picture doesn't have the necessary aspect ratio you get the message shown above. | ||
|- | |- | ||
| style="text-align: left; vertical-align: top;" |[[File:ZEuS_Stempel2.png|none|24x24px]] | | style="text-align: left; vertical-align: top;" |[[File:ZEuS_Stempel2.png|none|24x24px]] | ||
| style="text-align: left; vertical-align: top;" |Click in the picture | | style="text-align: left; vertical-align: top;" |Click in the picture. Select the image detail to the preferred size by moving the mouse while holding down the left mouse key. Move the rectangle to the position you like. Watch the '''Vorschaubild''' (''Picture preview'') on the right. | ||
|- | |- | ||
| style="text-align: left; vertical-align: top;" |[[File:ZEuS_Stempel3.png|none|24x24px]] | | style="text-align: left; vertical-align: top;" |[[File:ZEuS_Stempel3.png|none|24x24px]] | ||
| style="text-align: left; vertical-align: top;" |<span style="color: #008000;">'''Save'''</span> | | style="text-align: left; vertical-align: top;" |Save your settings by clicking on <span style="color: #008000;">'''Save'''</span> and return to the ''My data'' tab. | ||
|} | |} | ||
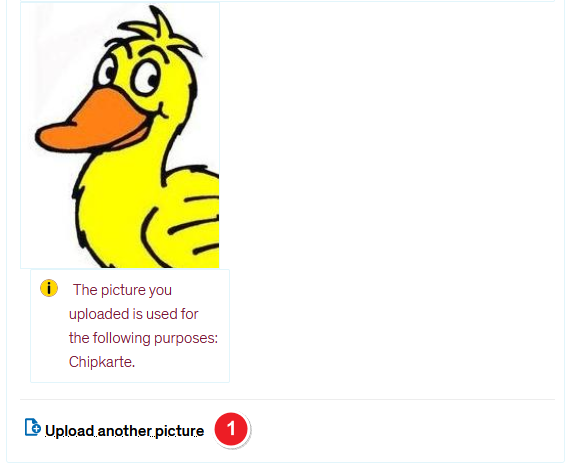
===Step 3: View after | ===Step 3: View after picture upload=== | ||
{| style="border: 2px; border-style: solid; border-color: #00a9e0; width: 100%;" cellspacing="5" | {| style="border: 2px; border-style: solid; border-color: #00a9e0; width: 100%;" cellspacing="5" | ||
|- | |- | ||
| style="width: 33%;" | | | style="width: 33%;" | | ||
{{Klappbox-bluespice|[[File:ZEuS_icon_Screenshot.png|ZEuS_icon_Screenshot.png]] View after | {{Klappbox-bluespice|[[File:ZEuS_icon_Screenshot.png|ZEuS_icon_Screenshot.png]] View after picture upload|2= [[File:ZEuS Stud SService Daten Foto 3 en.png|none]]}} | ||
|} | |} | ||
| Line 71: | Line 71: | ||
|- | |- | ||
| style="text-align: left; vertical-align: top; width: 50px;" |[[File:ZEuS_Stempel1.png|none|24x24px]] | | style="text-align: left; vertical-align: top; width: 50px;" |[[File:ZEuS_Stempel1.png|none|24x24px]] | ||
| style="text-align: left; vertical-align: top;" | | | style="text-align: left; vertical-align: top;" |You see the selected picture detail of the photo you have uploaded. If you're not conteted with it you can change it every time by clicking on the <span style="color: #008000;">'''Upload another picture'''</span> link to upload another photo of you. The process steps are the same. | ||
|} | |} | ||
==See also== | ==See also== | ||
Revision as of 08:57, 19 December 2019
Introduction
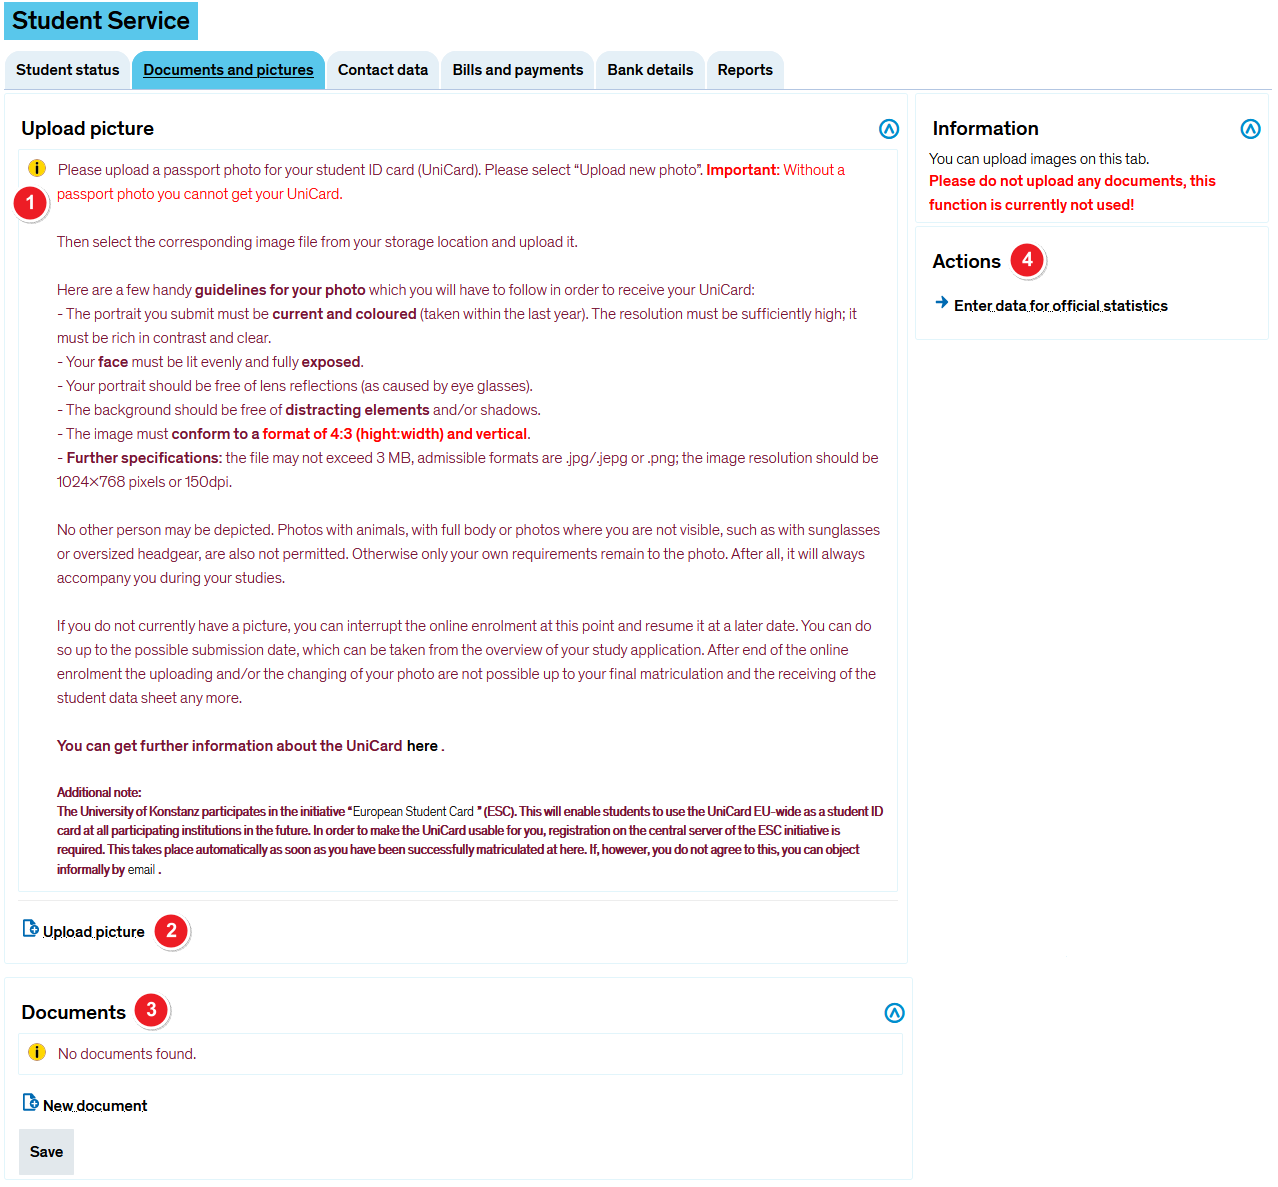
You upload the photo which is used for the UniCard on the Pictures tab which you find under the My studies → Student service menu item. Read the present article to learn more about the single steps which are necessary for this.
If you haven't uploaded a photo already, e.g. in the online immatriculation process, you get the view shown in the following screen shot.
