Actions

Student service - "Documents and pictures" tab

From ZEuS-Wiki english


Introduction

You upload the photo which is used for the UniCard on the Pictures tab which you find under the My studiesStudent service menu item. Read the present article to learn more about the single steps which are necessary for this.

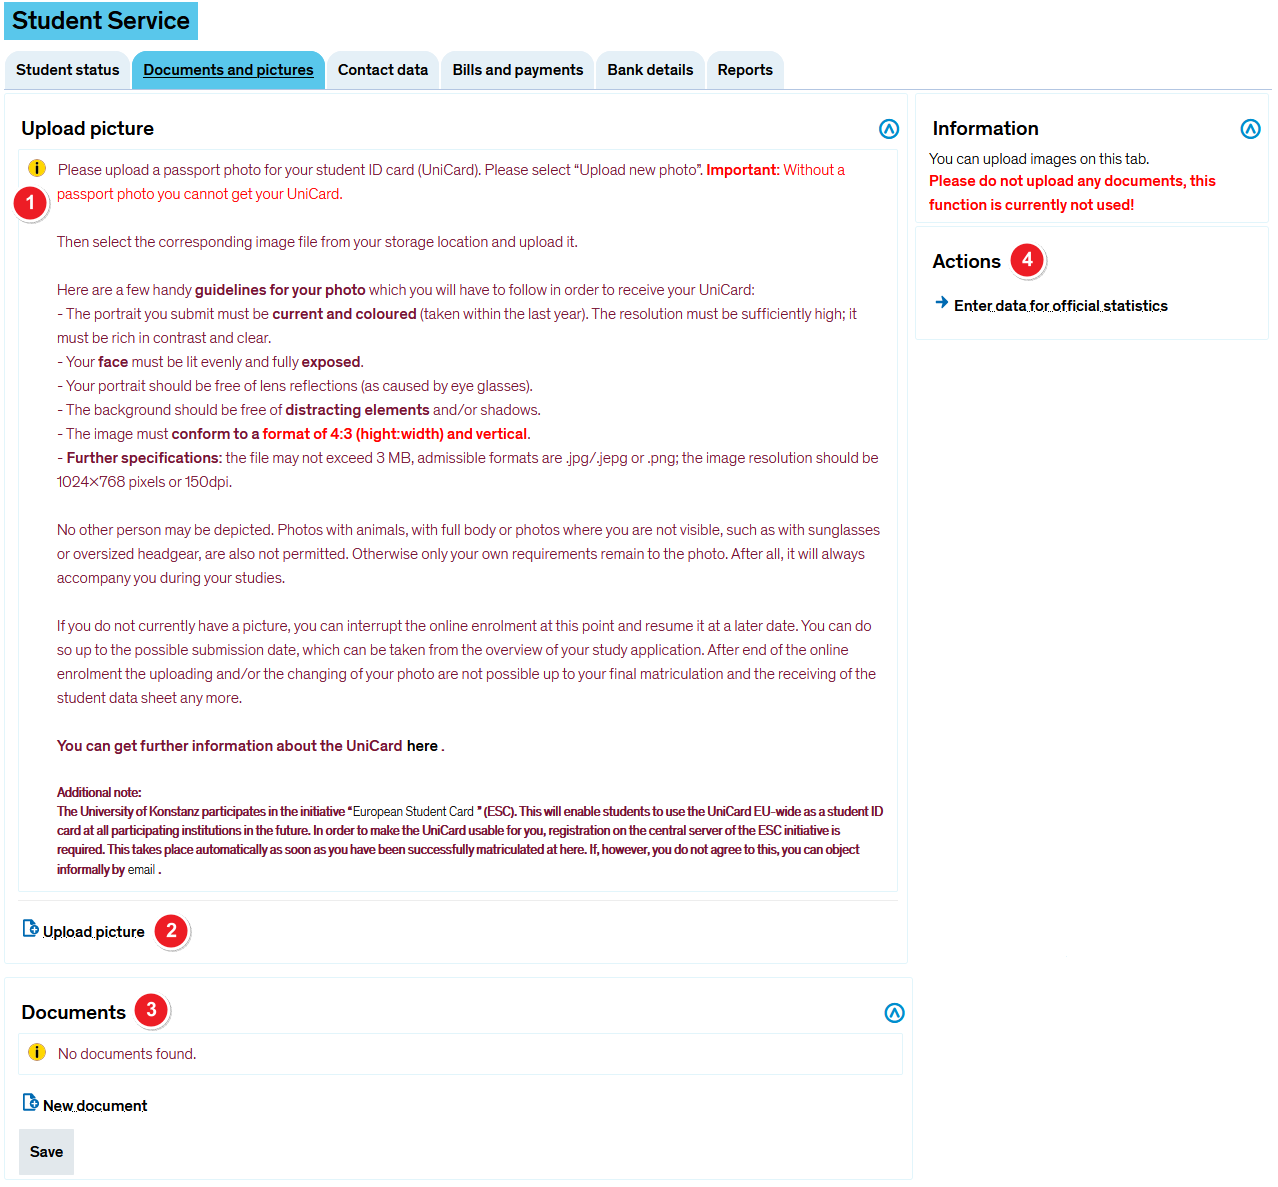
If you haven't uploaded a photo already, e.g. in the online immatriculation process, you get the view shown in the following screen shot.

View without photo

ZEuS_icon_Screenshot.png View without photo

ZEuS Stud SService Bilder ohne en.png
ZEuS Stempel1.png
Read the informationen about file usage as well as the file specifications.
ZEuS Stempel2.png
Click the Upload picture button to start the photo upload assistant in a popup window. You can change your picture any time by clicking on the Upload different picture button later. The subsequent steps are the same.
ZEuS Stempel3.png
The funktion in the Documents section will not be used yet!
Mb-achtung.png
Please note: Do not create any new documents!
ZEuS Stempel4.png
In the Actions section you find the hyperlink Enter data for official statistics. Clicking on it, you will get to a page where you can provide details concerning your citizenship and your university career if they are not complete. The data will be transmitted to the statistical offices and are mandatory because of the Higher Education Statistics Act. Look at the Student service - Information about official statistics page to get further information.

Photo upload steps

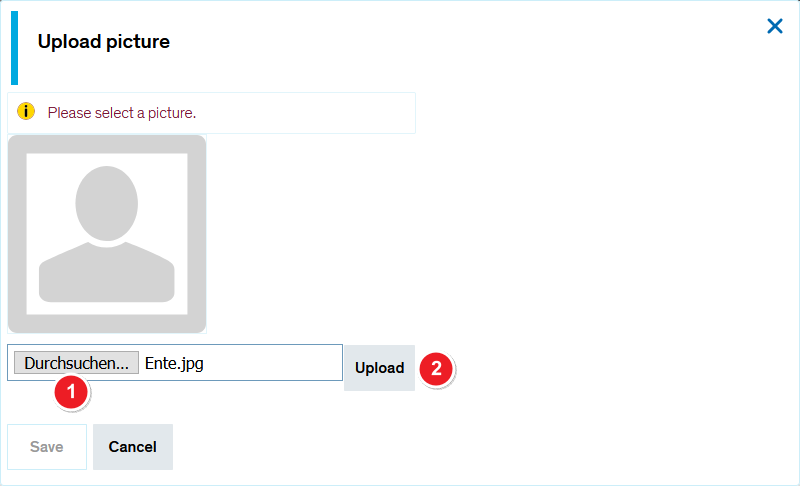
Step 1: Select your picture

ZEuS_icon_Screenshot.png Select your picture

ZEuS Stud SService Daten Foto 1 en.png
ZEuS Stempel1.png
To upload your picture, you must first select the appropriate file on your computer by clicking on Browse... or Durchsuchen....
ZEuS Stempel2.png
After selecting the picture you want to upload hit the Upload button next.

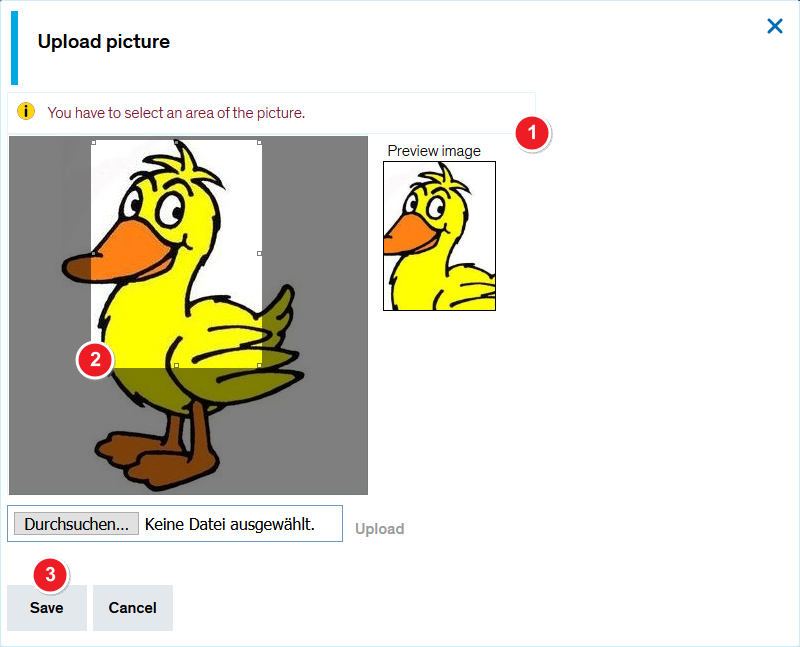
Step 2: Select picture detail

ZEuS_icon_Screenshot.png Select picture detail

ZEuS Stud SService Daten Foto 2 en.png
ZEuS Stempel1.png
If your picture doesn't have the necessary aspect ratio you get the message shown above.
ZEuS Stempel2.png
Click in the picture. Select the image detail to the preferred size by moving the mouse while holding down the left mouse key. Move the rectangle to the position you like. Watch the Preview image on the right.
ZEuS Stempel3.png
Save your settings by clicking on Save and return to the Documents and pictures tab.

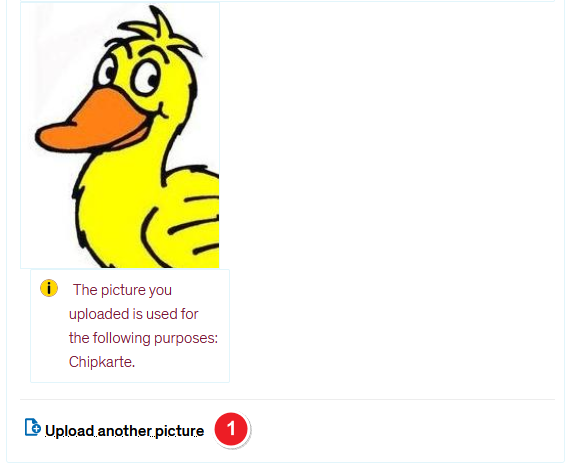
Step 3: View after picture upload

ZEuS_icon_Screenshot.png View after picture upload

ZEuS Stud SService Daten Foto 3 en.png
ZEuS Stempel1.png
You see the selected picture detail of the photo you have uploaded. If you're not conteted with it you can change it every time by clicking on the Upload another picture link to upload another photo of you. The process steps are the same.

See also