Introduction
You upload the photo which is used for the UniCard on the Pictures tab which you find under the My studies → Student service menu item. Read the present article to learn more about the single steps which are necessary for this.
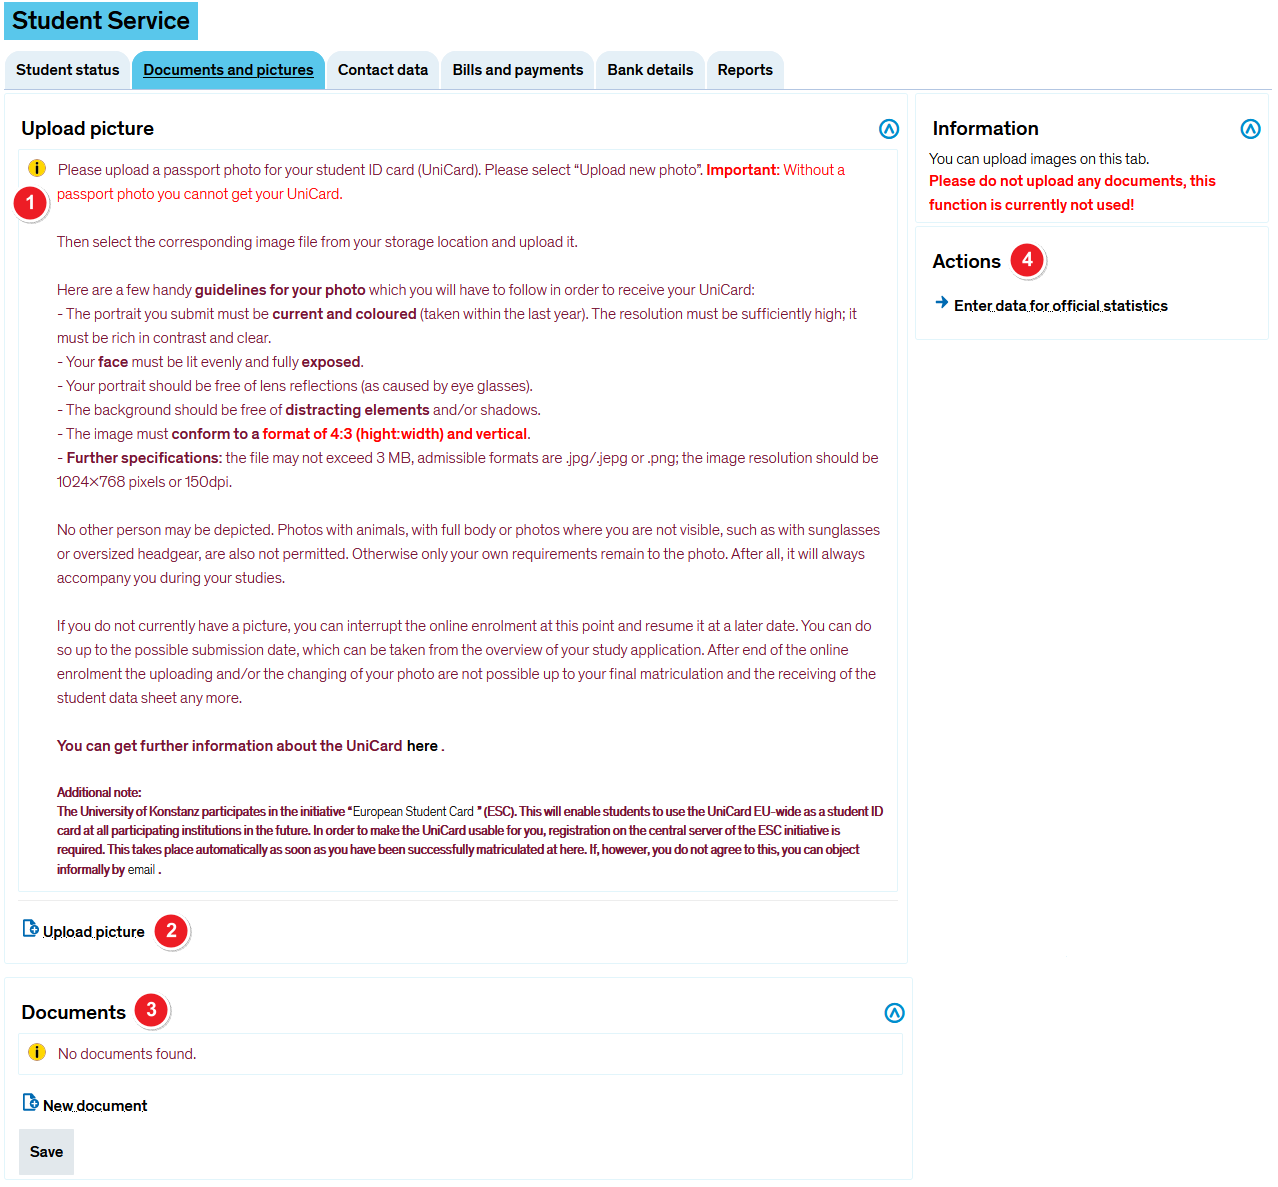
If you haven't uploaded a photo already, e.g. in the online immatriculation process, you get the view shown in the following screen shot.
View without photo
View without photo
|
|
Read the informationen about file usage as well as the file specifications.
|
|
Click the Upload picture button to start the photo upload assistant in a popup window. You can change your image any time by clicking on the Upload different picture button. The following steps are the same.
|
Photo upload steps
Step 1: Photo selection
Photo selection
|
|
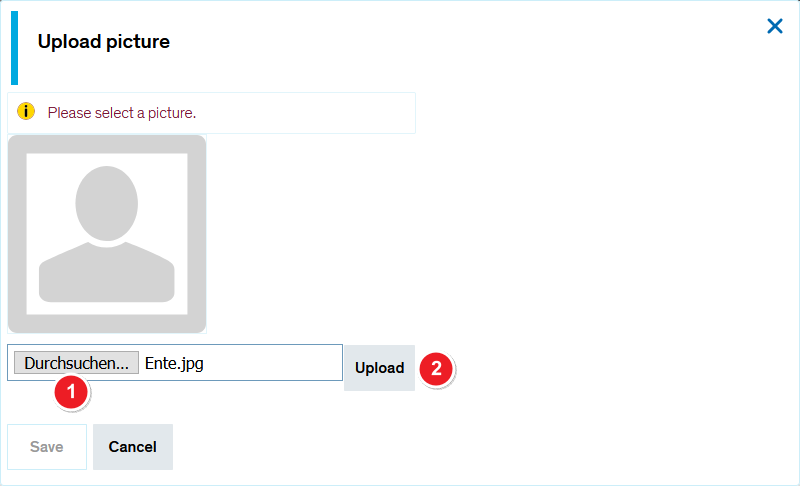
First choose a file on your file system by clicking the Durchsuchen button.
|
|
Then click Upload to upload it.
|
Schritt 2: Bildausschnitt festlegen
Bildausschnitt festlegen
|
|
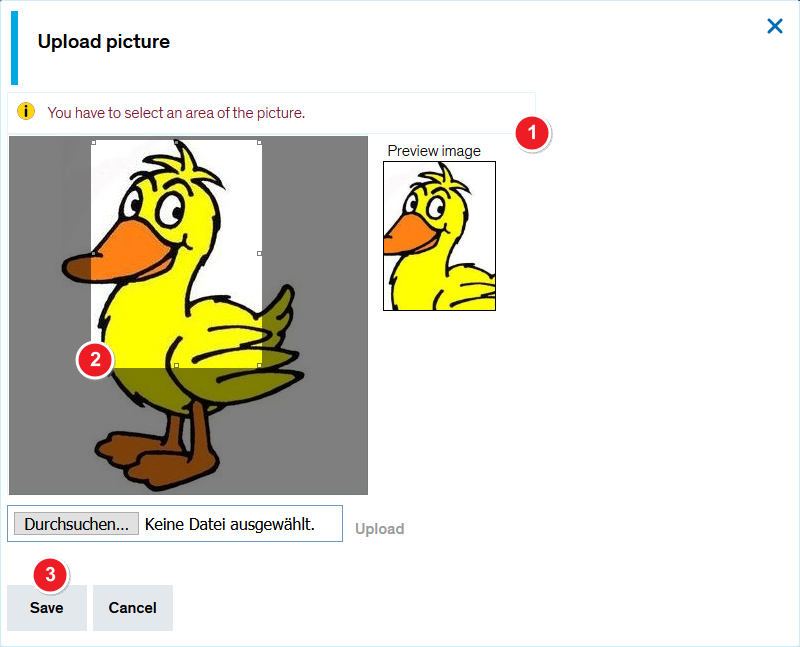
Sollte Ihr Bild nicht die erforderlichen Seitenverhältnisse aufweisen, erhalten Sie die abgebildete Meldung.
|
|
Klicken Sie ins Bild, halten Sie die linke Maustaste gedrückt und ziehen Sie den Bildausschnitt so groß, wie Sie ihn haben möchten. Verschieben Sie das Rechteck auf die gewünschte Position. Im Vorschaubild auf der rechten Seite sehen Sie den Ausschnitt in der Vorschau.
|
|
Sichern Sie Ihre Einstellungen mit Klick auf Speichern, um zur Registerkarte Daten zurückzukehren.
|
Schritt 3: Ansicht nach Foto-Upload
Ansicht nach Foto-Upload
|
|
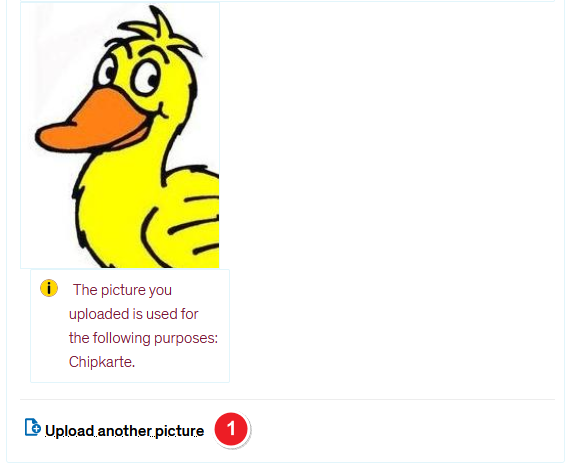
Sie sehen das hochgeladene Foto mit dem gewählten Ausschnitt. Falls es Ihnen nicht gefällt, können Sie es mit Klick auf die Schaltfläche Anderes Bild hochladen ändern. Die Schritte sind dann dieselben.
|
See also